
How to Set Up Your Brand Kit in Canva (2026 Tutorial)
Aug 03, 2026To set up a brand kit in Canva, open the Brand tab in the left sidebar, click create new brand kit, name it, and then fill in each category — logos, colors, fonts, brand voice, photos, graphics, icons, and components. You can build it manually or paste your website URL and let Canva scan it to pull your logo and colors automatically. The full brand kit requires Canva Pro; the free plan only lets you save three brand colors.
Key takeaways
- The fastest way to start is pasting your website URL — Canva scans it and pulls your logo and colors for you.
- Canva Pro lets you create up to 100 separate brand kits, so you can keep different brands or clients apart.
- A color palette holds individual colors; a color theme tells Canva which color goes on backgrounds, text, and elements.
- Components are the most overlooked feature — reusable elements you can recolor everywhere at once from a single source.
- The free plan gives you three brand colors and nothing else. Everything below needs Canva Pro.
If you've ever spent twenty minutes digging through old designs trying to remember your exact brand color — or eyeballing fonts, trying to recall which one you used last time — I see you, friend.
That was me for a long time. Then I set up my brand kit, and that entire struggle just evaporated.
The Canva brand kit holds your colors, your fonts, your logos, your photos — everything that keeps your designs on brand — and keeps it all ready at your fingertips every time you start designing. It's honestly one of my favorite Canva features.
So let me walk you through setting it up, category by category, in the current 2026 layout. I don't gatekeep, so I'm covering all of it — including one feature most people never even discover that's a total game changer.
Heads up — some links below are affiliate links, which means I may earn a small commission if you buy through them, at no extra cost to you. I only recommend tools I actually use.
Do you need Canva Pro to set up a brand kit?
Mostly, yes. On the free plan, the only thing the brand kit lets you do is save three brand colors. Better than nothing, but very limited.
Everything else in this walkthrough — logos, custom fonts, brand voice, components, multiple kits — needs Canva Pro. If you don't have it, there's a free 30-day Canva Pro trial here so you can set the whole thing up and see if it earns its place before you pay for anything.
How to create your brand kit in Canva
From the Canva homepage, click Brand in the left sidebar. Under the dropdown, click create new brand kit and give it a name.
Quick note that surprises people: with Canva Pro you can create up to 100 brand kits. So if you run different brands, or design for multiple clients, you're not stuck with one. Keep them separate.
Once it's named, you've got two ways to build it out.
Option one — start from scratch. Manually add your colors, fonts, and assets to each category.
Option two — let Canva do the first pass. Paste your website URL at the top and Canva scans it, pulling your logo and colors automatically. You can also upload a PDF of your brand guidelines and it'll do the same thing.
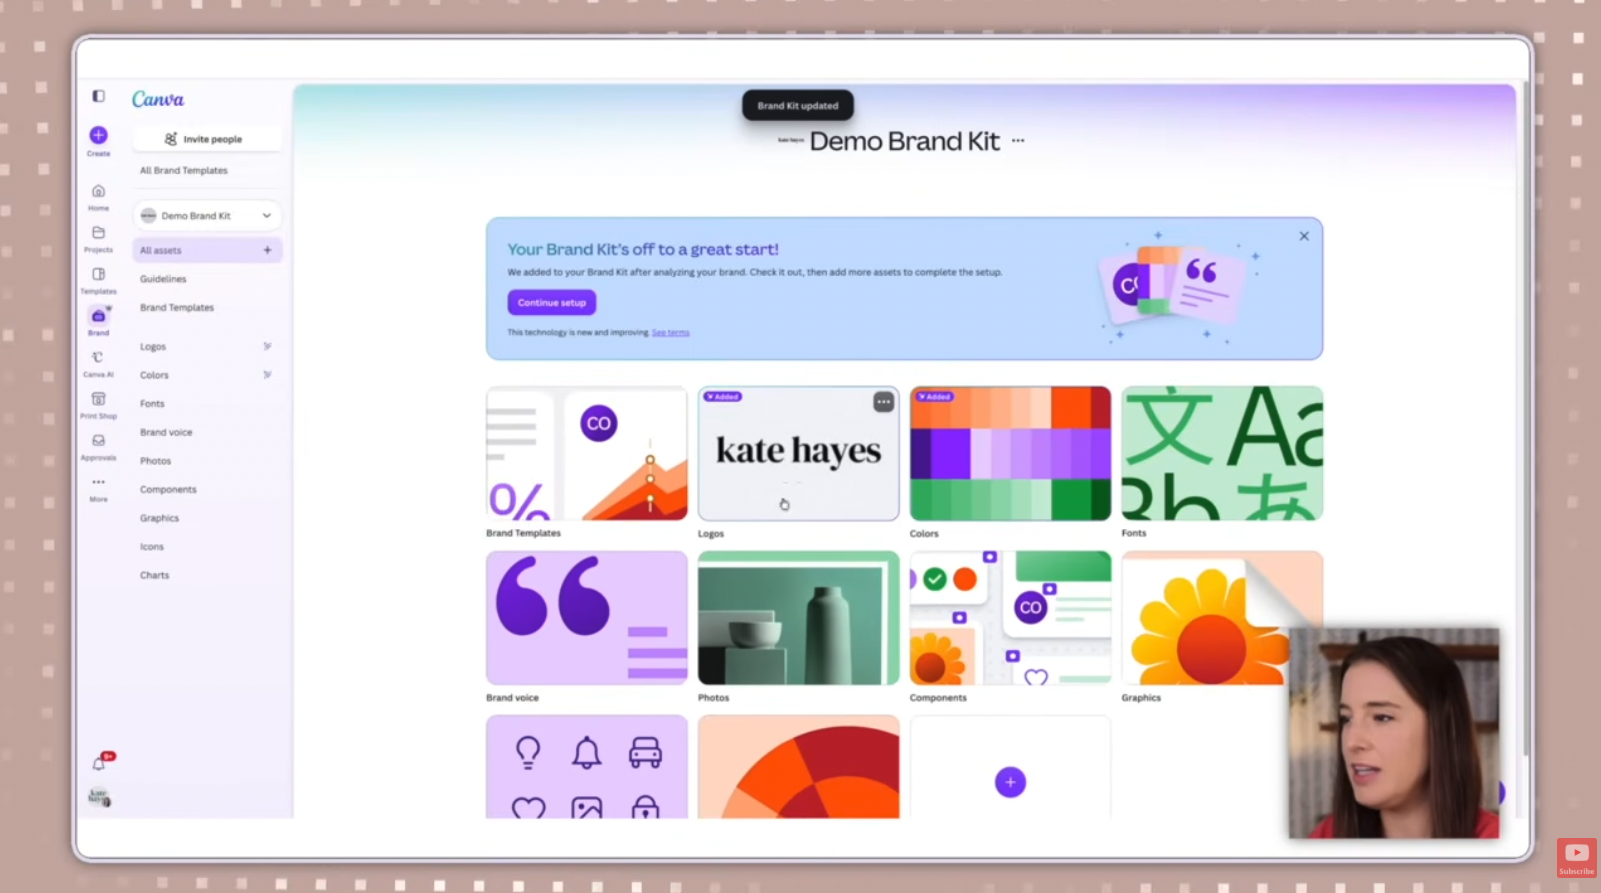
When I typed in my website, Canva assembled a starter kit in seconds — it grabbed my main logo and several of my brand colors right away. It won't catch everything, so you'll still fill in the gaps, but it beats starting from a blank screen.
Setting up each brand kit category
Here's every category, in the order Canva shows them, and what actually goes in each.
Brand templates
If you've already saved designs as Canva brand templates, Canva may list them here as suggested templates. Select the ones you want and click add suggested templates — now they're available inside the kit anytime, no searching required.
Logos
Click the plus button, choose upload files, and add your logo files. You can store several — a main logo, plus variations for different projects or clients.
For logos, upload a transparent PNG or, better, an SVG. SVG lets you recolor the logo inside any design and scale it up without it going pixelated.
No logo yet? Make one in Canva, then go to Share → Download and pick your file type. Both SVG and the transparent-background PNG option have a little crown on them, meaning they're Canva Pro features — so you'll need Pro to export either way.
Colors
This category has two subsections that trip people up: palettes and themes. They're not the same thing, and the difference matters.
Your palette is your set of main brand colors. Click add a new color and pick it visually, paste a hex code, or even add a gradient. You can hold more than one palette in a single kit — handy for different launches or projects — by clicking the plus and choosing add palette.
Not sure what your colors should even be? Canva has a free tool at canva.com/colors — upload a photo and it builds a palette from the image, or browse preset palettes and copy the hex codes back into your kit.
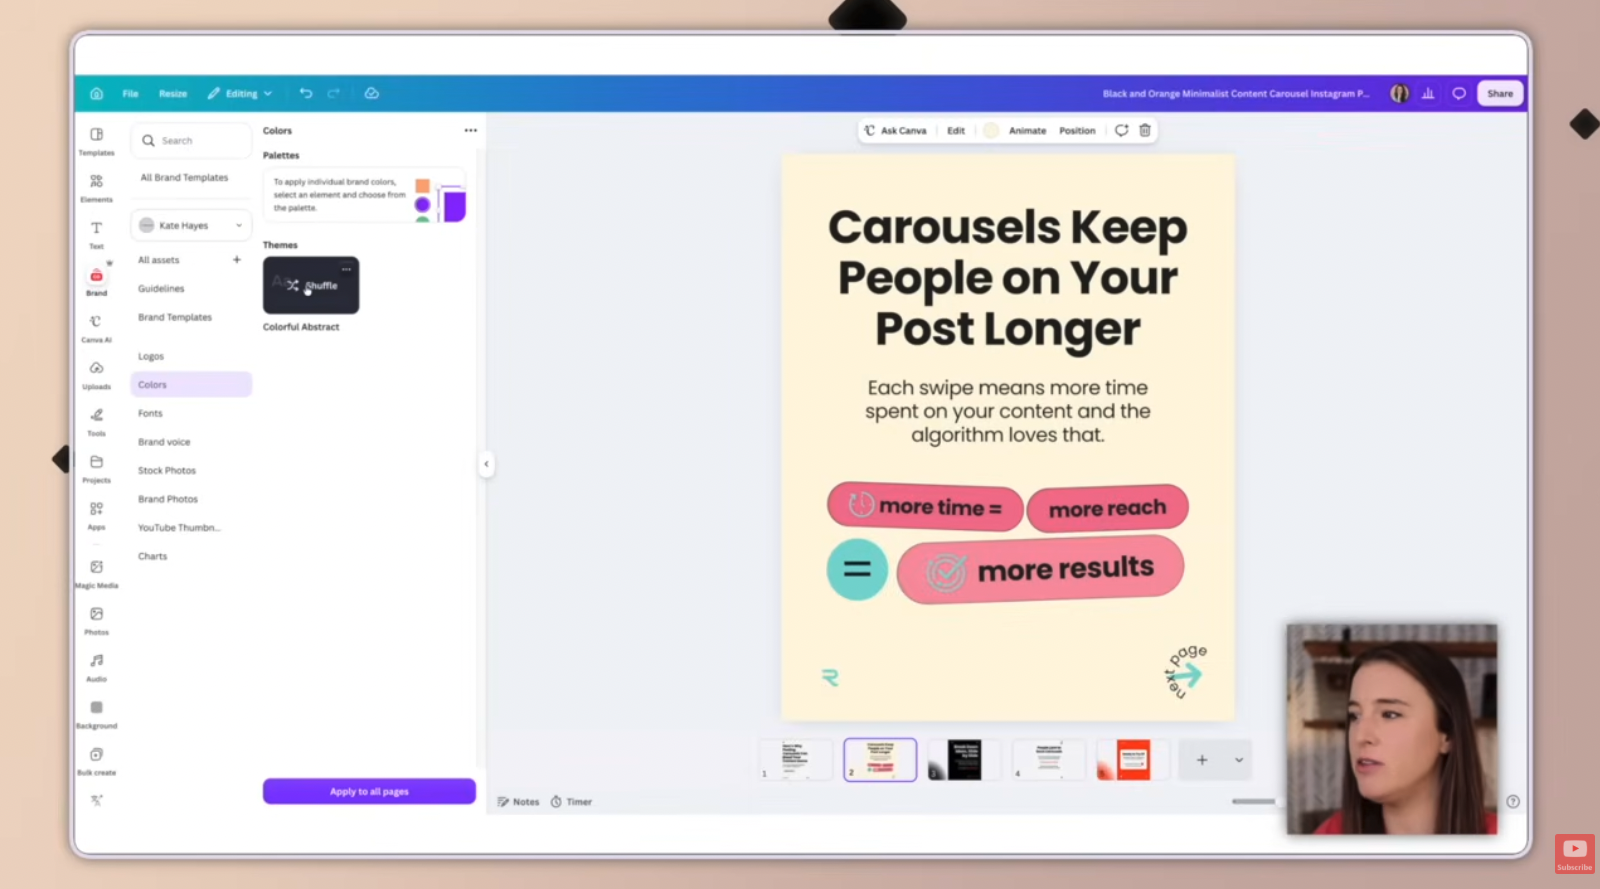
Your color theme is the smarter cousin. Click generate color theme, pick a past design, and Canva pulls color combinations from it. The difference: a palette gives you colors to apply one at a time, while a theme tells Canva which color belongs on the background, which on text, which on elements — so it applies them correctly every time. I went deeper on color themes in my post on hidden Canva features most people aren't using, if you want the full breakdown.
Fonts
Canva starts you with font slots — title, subtitle, heading, subheading, and so on. Delete the ones you don't need with the trash icon. For the ones you want, click in and pick a font from the full Canva library, then set its size, bold, or italic.
Got a font that isn't in Canva? Click the plus, choose upload a font, and bring in your own file. You can find fonts to buy on Creative Market, Etsy, Google Fonts, or Font Squirrel.
Setting up a brand kit is step one. Actually making money with your Canva designs is the next step — my free 45-minute masterclass walks through the exact four-step system for building a passive-income digital products business. Watch the free masterclass here.
Brand voice
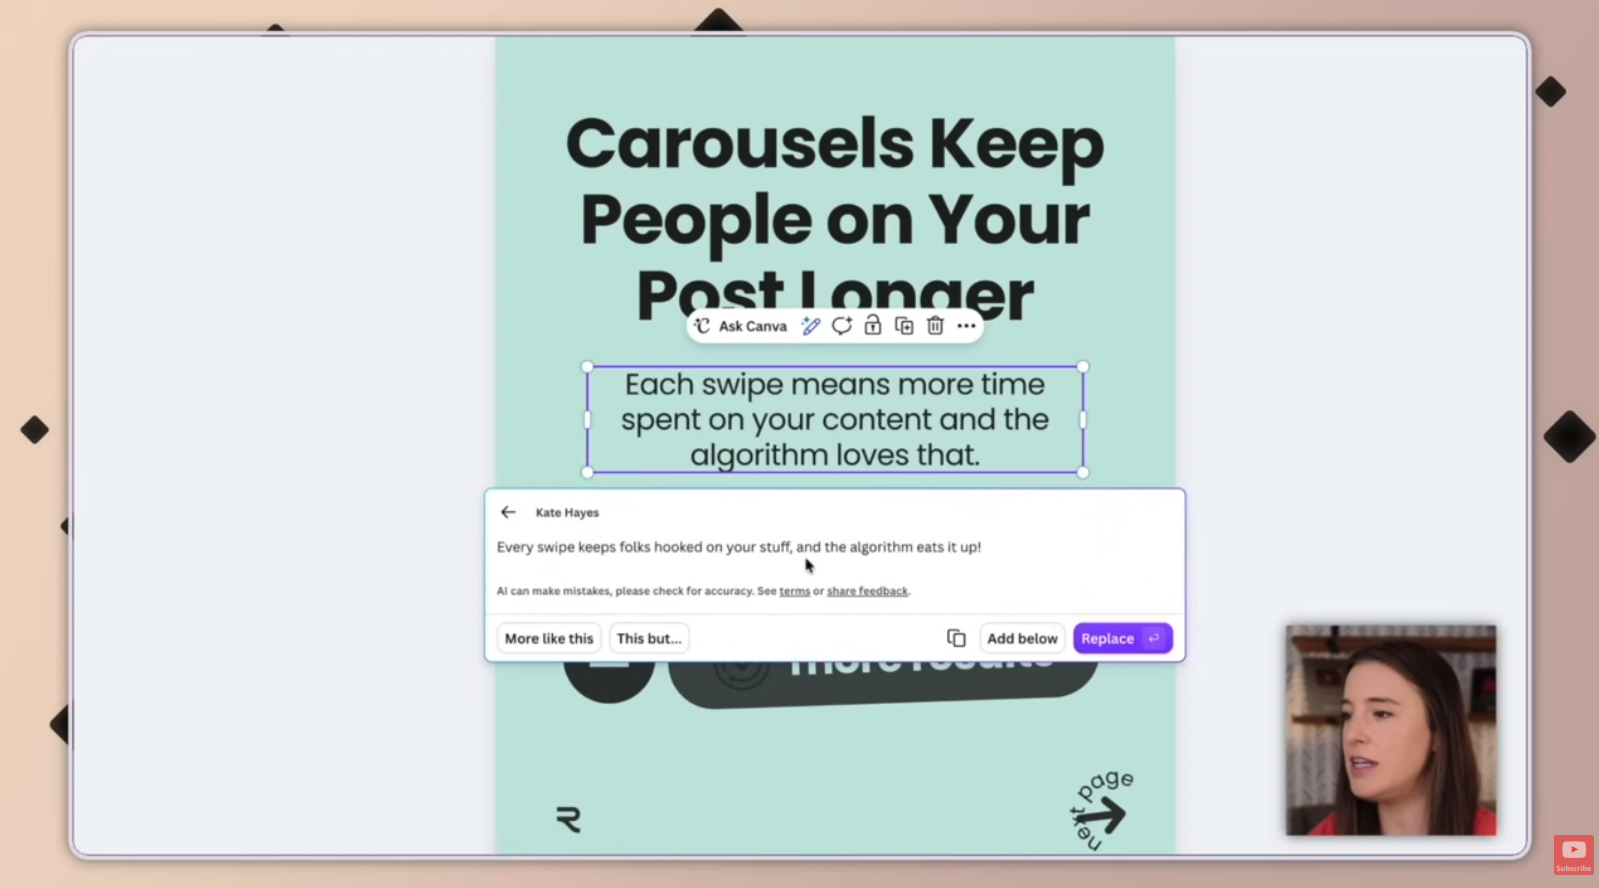
This one's underrated. Once your brand voice is in your kit, you can select any text box in a design, go to Magic Write → change voice, and click apply brand voice — Canva's AI rewrites that text to sound like you. Like it, hit replace; don't, regenerate.
To set it up, click add a brand voice and describe how you want to sound: fun, casual, relatable, formal, edgy. If you're stuck describing it, here's the exact prompt I use with Claude:
"I want to create a description of my brand voice. Ask me clarifying questions to help me define my brand voice. Then generate the final description for me to use. Do not exceed 500 characters."
Answer its questions, go back and forth until it nails your voice, then copy the description into your brand voice section and save.
Photos, graphics, and icons
These three work the same way — click in, choose add brand assets or the plus button, and upload files. The intended split is: photos for stock imagery, graphics for gradients, textures, and non-photo elements, and icons for simple symbols and illustrations.
But you don't have to use them as labeled. I renamed mine — my "photos" became stock photos, my "graphics" became brand photos (actual photos of me from brand shoots), and my "icons" became YouTube thumbnail assets. To rename any category, hover it in the left menu, click the three dots, and choose rename.
Components (the game changer)
This is the feature most people never find, and it's the one I'd tell you not to skip.
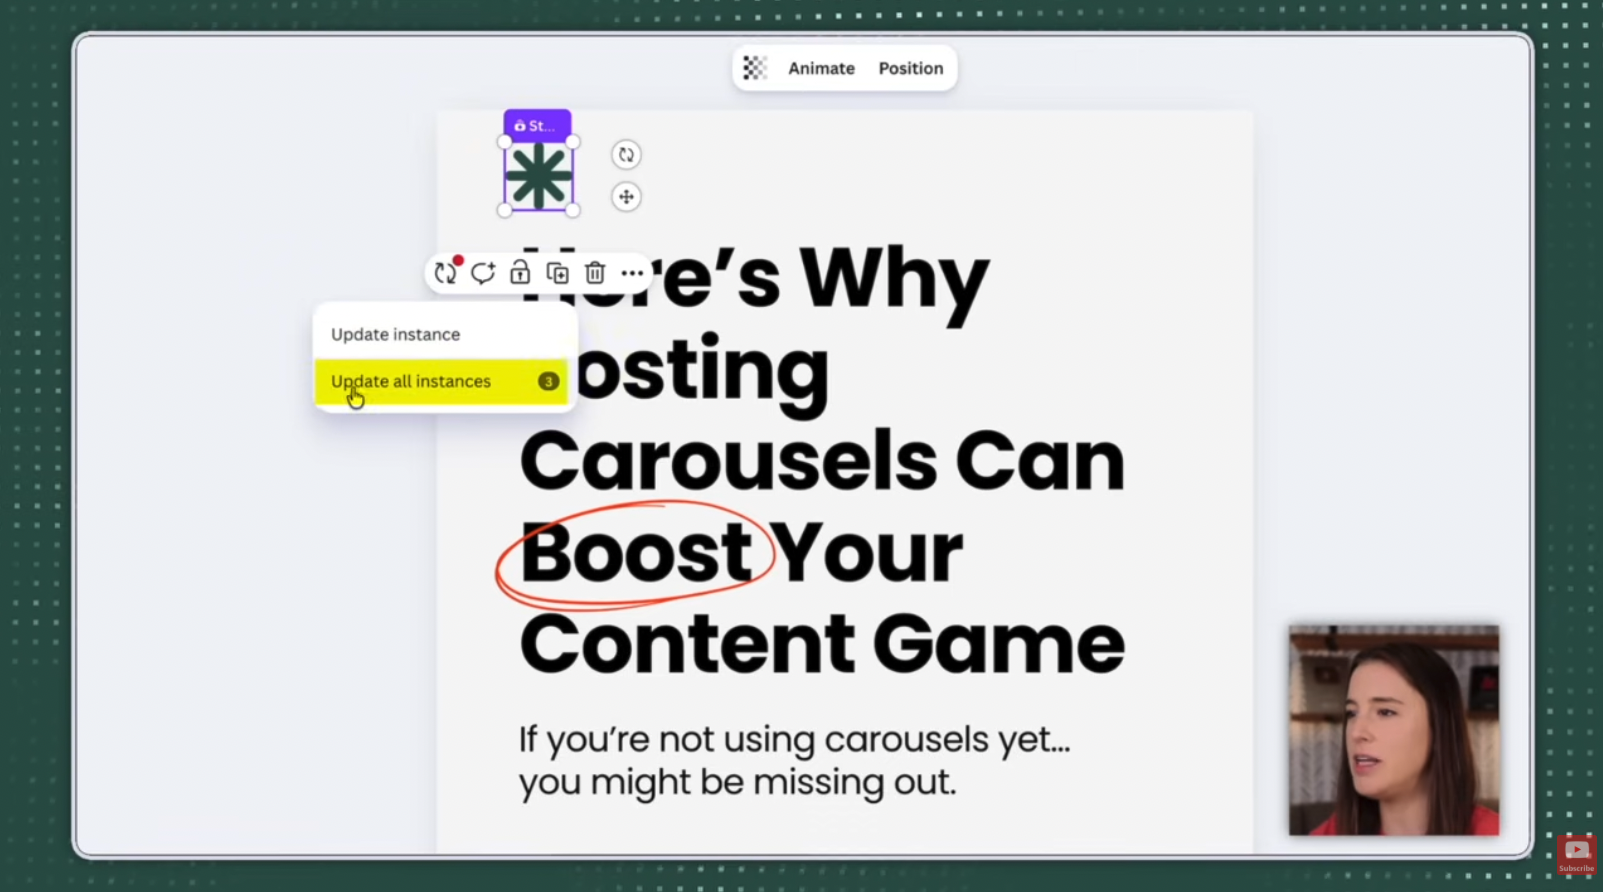
A component is an element you reuse across many designs — and can then edit everywhere at once from one source. Say you use a little star icon on twenty designs. Select it, click the three dots on the floating toolbar, choose create component, name it, and save it to your kit's components category.
Here's why it matters. Later, when you rebrand and want that star in orange instead of green, you don't touch twenty designs. You open the component's source, change the color once, and click publish updates. Back in your designs, Canva shows an update is available — with a little number for how many places it's used — and you click update all instances. Done. Every copy changes at once.
Charts, custom categories, and sections
The charts category holds color preferences for any charts you build. And if Canva's preset categories don't cover what you need, click new categories to add your own — name it, click add, done.
For heavier kits, you can also add sections to group categories. Go to all assets, click the plus, choose add a section, and name it. You can even give each category a custom cover image via the three dots → update cover image.
How to use your brand kit in a design
This is where the setup pays off. Say you're editing a presentation template that's nothing like your brand.
Colors: click the element you want to recolor, open the color menu, and your brand colors are already there — no hunting for hex codes. Pick one, and if you click change all, every page using that old color updates at once.
Fonts: select the text, open the font menu, and your brand fonts are saved right at the top. One click swaps it. Change all applies it across every matching title on every page.
Photos: go to Brand in the sidebar, open your photos, and drag your own brand photo straight in to replace a placeholder.
What used to be slow, manual, page-by-page work becomes a handful of clicks.
Frequently asked questions
How do you set up a brand kit in Canva?
Open the Brand tab in the left sidebar from the Canva homepage, click create new brand kit, and name it. Then either paste your website URL to have Canva auto-pull your logo and colors, or fill in each category manually — logos, colors, fonts, brand voice, photos, graphics, icons, and components.
Can you set up a brand kit on the free version of Canva?
Only partially. The free plan lets you save three brand colors and nothing else. Logos, custom fonts, brand voice, components, and multiple kits all require Canva Pro.
How many brand kits can you have in Canva?
On Canva Pro you can create up to 100 separate brand kits. That's useful if you manage multiple brands or design for different clients and want to keep each one's assets separate.
What's the difference between a color palette and a color theme in a Canva brand kit?
A palette is a set of colors you apply individually. A color theme is a combination where Canva knows which color to use for the background, which for text, and which for elements — so it applies them correctly and consistently every time.
Can Canva build my brand kit from my website automatically?
Yes. When you create a brand kit, paste your website URL at the top and Canva scans the site, pulling in your logo and brand colors as a starting point. It won't capture everything, but it saves you from building from scratch. You can also upload a PDF of your brand guidelines to do the same.
What are components in a Canva brand kit?
Components are reusable elements you save to your kit and can edit across all your designs at once. Change the component at its source, publish the update, and every design using it can be updated with a single click instead of editing each one by hand.
How do I add my own fonts to a Canva brand kit?
In the fonts category, click the plus icon and choose upload a font, then select your font file. This lets you use fonts that aren't in Canva's built-in library. Uploading custom fonts requires Canva Pro.
Ready to turn your Canva skills into income?
A brand kit makes your designs look professional. The next step is selling them. Digital products are created once and sell on repeat — no inventory, no shipping. My free 45-minute masterclass walks through the exact four-step system for starting a digital products business, even from total scratch.
So — are you a start-from-scratch builder, or are you going to let Canva scan your website and cheat the first step? Either way, your future self will thank you for finally having it all in one place.
Want the shortcut to selling what you design? Watch the free masterclass and you'll be automatically added to my email list for more like this!
